The MacBook Air M1 is one of Apple’s standout laptops, known for its impressive performance, energy efficiency, and sleek design. However, despite its power, one limitation leaves some users frustrated: the inability to natively connect more than one external monitor. If you’re someone who needs multiple monitors for multitasking, productivity, or creativity, this can be a significant hurdle.
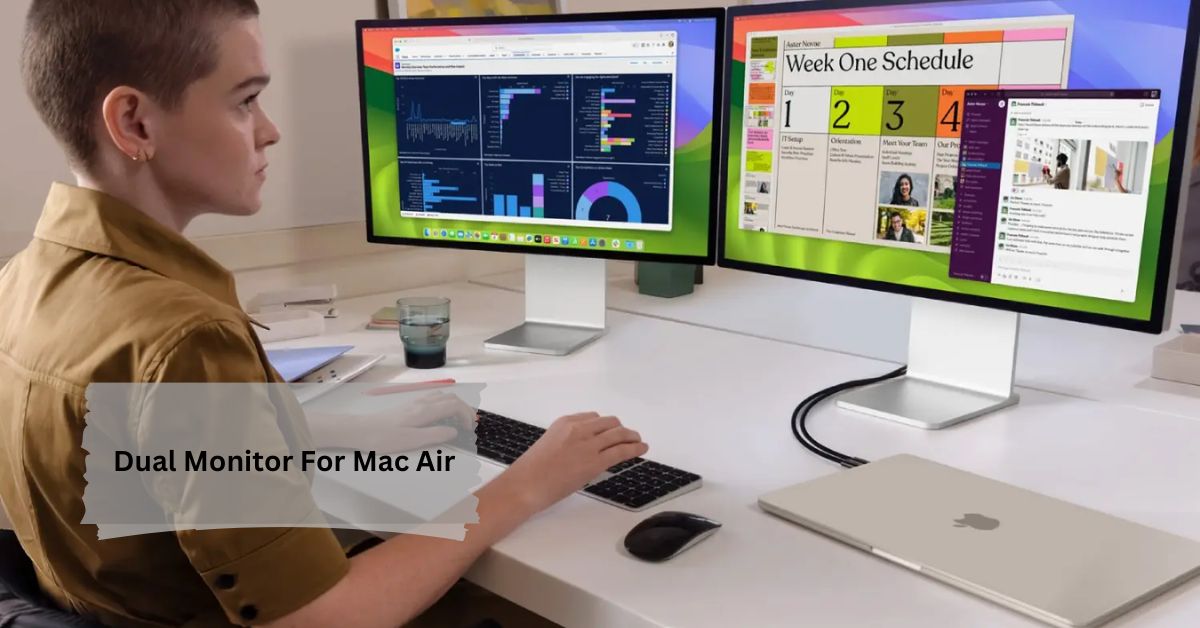
Although the MacBook Air M1 natively supports only one external monitor, you can connect two using workarounds like DisplayLink adapters, USB-C docking stations, or Sidecar for an iPad.
Fortunately, even though the MacBook Air M1 officially supports only one external display, there are ways to connect two external monitors using a few workarounds. In this guide, we’ll explore different methods to help you achieve a dual-monitor setup, including the tools you’ll need, the steps to follow, and the potential pros and cons of each approach.
Why Does MacBook Air M1 Only Support One External Monitor?
To understand why this limitation exists, we need to take a quick look at the M1 chip. Apple’s custom silicon is highly efficient and designed for superior battery life and performance. However, one trade-off is its support for only one external monitor natively, unlike Intel-based MacBooks that could connect to multiple displays with ease. For users who need extra screen space for multitasking, this limitation can feel restrictive.
Method 1: Using a DisplayLink Adapter
One of the most popular and reliable methods to connect two external monitors to the MacBook Air M1 is through a DisplayLink adapter. DisplayLink technology enables your Mac to recognize additional displays by using software to process video data through USB ports.
What You’ll Need:
- DisplayLink Adapter: Look for adapters from reputable brands like Plugable or StarTech. These devices typically come with multiple video outputs such as HDMI or DisplayPort.
- USB-C Hub or Dock (Optional): Depending on your needs, a USB-C hub can help expand your MacBook’s ports, allowing for more peripherals in addition to monitors.
- DisplayLink Software: Download and install the DisplayLink Manager from the DisplayLink website. This software is necessary for your Mac to recognize the second monitor connected via the DisplayLink adapter.
Step-by-Step Setup:
- Connect the First Monitor: Use the Thunderbolt 3 port to connect your first external monitor directly.
- Install the DisplayLink Manager App: Follow the installation instructions from the DisplayLink website and grant any necessary permissions.
- Connect the Second Monitor via DisplayLink: Plug the second monitor into the DisplayLink adapter using HDMI or DisplayPort, then connect the adapter to a USB-C port on your MacBook Air.
- Enable the Second Monitor: Open the DisplayLink Manager app and ensure the second monitor is recognized. You can now adjust display settings in System Preferences → Displays.
Pros and Cons of DisplayLink:
- Pros:
- Works with various monitor types and resolutions.
- Simple and reliable solution for most users.
- Suitable for general tasks like web browsing, document editing, and light design work.
- Cons:
- Some performance lag during high-end tasks (e.g., video editing, gaming).
- Slightly more complex setup compared to native monitor support.
Example Use Case:
Sarah, a freelance graphic designer, needed more screen space to manage her projects effectively. After struggling with just one monitor, she invested in a DisplayLink adapter to add a second screen. While her setup worked smoothly for most tasks, she noticed a slight lag when working on resource-heavy software like Adobe Illustrator, though this was manageable for her workflow.
Method 2: Dual-Monitor Docking Stations
Another way to connect multiple external monitors to your MacBook Air M1 is by using a USB-C docking station. Many of these docking stations come with dual-monitor support and additional ports for connecting peripherals like a mouse, keyboard, or external storage.
What You’ll Need:
- A USB-C docking station with dual-monitor support. Brands like CalDigit, Anker, and Kensington offer well-regarded models. Check that the station you choose explicitly supports two external monitors.
- External monitors that are compatible with your docking station’s output options (HDMI, DisplayPort, or USB-C).
Step-by-Step Setup:
- Purchase a Docking Station: Ensure it supports dual external displays.
- Install Necessary Drivers (if applicable): Some docking stations, especially those using DisplayLink technology, may require you to install additional software.
- Connect the Monitors: Attach your monitors to the docking station via HDMI, DisplayPort, or USB-C depending on the ports available.
- Connect the Dock to Your MacBook Air: After connecting the dock, go to System Preferences → Displays to arrange and configure your monitors.
Pros and Cons of Docking Stations:
- Pros:
- Provides an all-in-one solution with additional ports for other peripherals.
- Clean setup with fewer cables.
- Typically supports high resolutions and refresh rates on dual monitors.
- Cons:
- Can be expensive compared to DisplayLink adapters.
- Some docks still rely on DisplayLink software, leading to potential performance issues.
Example Use Case:
John, a software engineer, uses a CalDigit Thunderbolt 4 dock to connect two 4K monitors for his work-from-home setup. The dock also provides extra ports for his external hard drives and other devices. He appreciates the streamlined connection, as only one cable connects everything to his MacBook. For his coding and multitasking needs, this setup is highly effective with no noticeable performance dips.
Method 3: Sidecar or Luna Display for iPad
If you own an iPad, you can use Apple’s Sidecar feature to turn it into a secondary display for your MacBook Air M1. This is a great solution if you don’t want to invest in additional hardware and are comfortable working with a smaller display. Alternatively, Luna Display is another option that allows you to use an iPad or another Mac as an additional screen.
How to Use Sidecar:
- Ensure Compatibility: Your MacBook Air M1 should be running macOS Catalina or later, and your iPad must have iPadOS 13 or newer.
- Connect via Wi-Fi or USB: In System Preferences → Displays, select Add Display and choose your iPad.
- Arrange the Displays: Once connected, you can drag the virtual display icons in the settings to configure how your MacBook and iPad are arranged.
Pros and Cons of Using an iPad:
- Pros:
- No additional hardware required if you already own an iPad.
- Seamless integration with macOS for productivity tasks.
- provides alternatives for wired and wireless connections.
- Cons:
- Limited to the size and resolution of your iPad.
- Some lag may occur, particularly with high-performance tasks like video editing.
Example Use Case:
Lucas, a video editor, frequently uses his iPad Pro as a secondary monitor while editing footage in Final Cut Pro. He finds Sidecar convenient for displaying timelines or referencing notes without cluttering his main screen. While it’s not as powerful as a full external monitor, the convenience and mobility of using his iPad in this way have significantly improved his workflow.
Things to Consider Before Connecting Two External Monitors
While it’s possible to set up two external monitors on the MacBook Air M1, there are several factors you should be aware of:
- Performance Impact: Running two external monitors can slightly reduce your MacBook’s overall performance, particularly during resource-heavy tasks like video rendering or gaming. DisplayLink and similar technologies process video data differently, which can cause slight delays or lower resolutions in some cases.
- Battery Drain: If you’re running two monitors without plugging your MacBook into power, expect a significant drop in battery life. The M1 chip is efficient, but running two displays demands more power.
- Software Compatibility: Ensure that the DisplayLink software or any drivers required by your docking station are compatible with the latest version of macOS. Apple updates can sometimes cause compatibility issues, so staying up to date is essential.
Conclusion: Finding the Best Setup for You
Although the MacBook Air M1 is limited to one external monitor by default, you can still connect two external displays using methods like DisplayLink adapters, USB-C docking stations, or Sidecar with an iPad. Each method has its benefits, depending on your needs, budget, and the tasks you’re performing.
For a simple and reliable solution, a DisplayLink adapter or USB-C docking station is recommended. If you already own an iPad, Sidecar provides a convenient, budget-friendly option. Whichever route you choose, these workarounds ensure that you can enjoy the productivity benefits of a multi-monitor setup on your MacBook Air M1.
FAQs
Can the MacBook Air M1 connect to two external monitors?
No, the MacBook Air M1 natively supports only one monitor, but you can use workarounds like DisplayLink adapters to connect two.
What is a DisplayLink adapter?
A DisplayLink adapter allows your MacBook to connect to multiple monitors by processing video data through USB ports with the help of software.
What is the best way to connect two monitors to MacBook Air M1?
Using a DisplayLink adapter or a USB-C docking station is the most reliable way to connect two external monitors to a MacBook Air M1.
Can I use an iPad as a second monitor for MacBook Air M1?
Yes, you can use Apple’s Sidecar feature to turn your iPad into a secondary display for your MacBook Air M1.
Does connecting two monitors affect MacBook Air M1 performance?
Yes, running two monitors can slightly reduce performance, especially during resource-intensive tasks like video editing or gaming.














Leave a Reply